Make Your Own Laundry Wash Bag
Make Your Own Laundry Wash Bag
I LOVE my washing machine and my dishwasher!
Together they can pretty much tackle any job you put to them.
In my washing machine I was everything form the most delicate of hosiery to the grubbiest of children’s sneakers and everything in between (not all together you understand.) I wash toys in the dishwasher as well as the heat gets rid of the germs.
Sometimes though small things or delicate things get lost, little things like hankies tend to sneak up into the arms of jackets and small toys end up in the filter.
Enter the wash bag!
If you keep the little things corralled in a bag you are less likely to misplace them and you can peg the washbag up on the line where the air can breeze though and dry them.
I find that delicate items put into a washbag get less lint on them and don’t tend to pill.
Now that we have established how wonderful they are lets go and make some!
This is pretty general as you can make these bags any size you like to fit the purpose that you need them for.
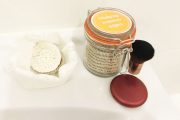
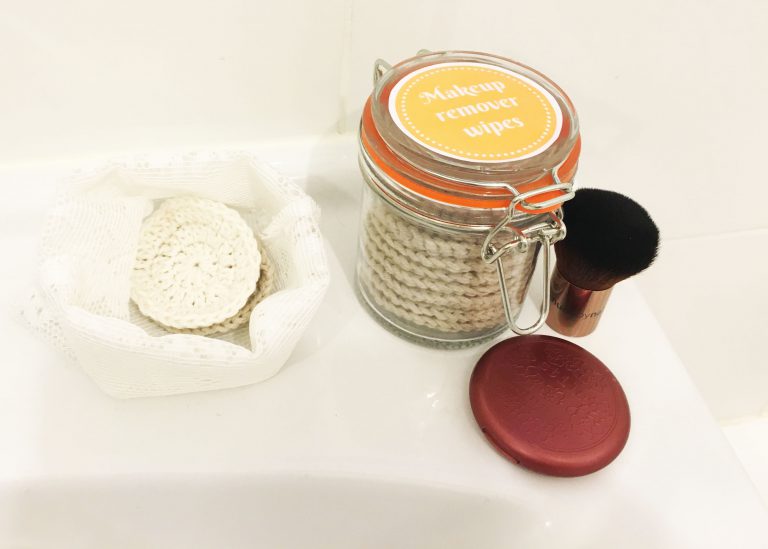
This example is the one I made to suit the makeup remover wipes from a previous project.
I found that if I leave the bag rolled open on the sink then the teenagers tend to put their used wipes in the bag for cleaning.
You will need:
- A sewing machine (or you can blanket stitch the edges by hand)
- Some lace curtain off cuts- you can get these very cheaply from Spotlight or your local op-shop will have heaps for next to nothing.
- White thread
- For the make up remover wipes I used a piece of curtain lace 20cm X 50cm
Instructions
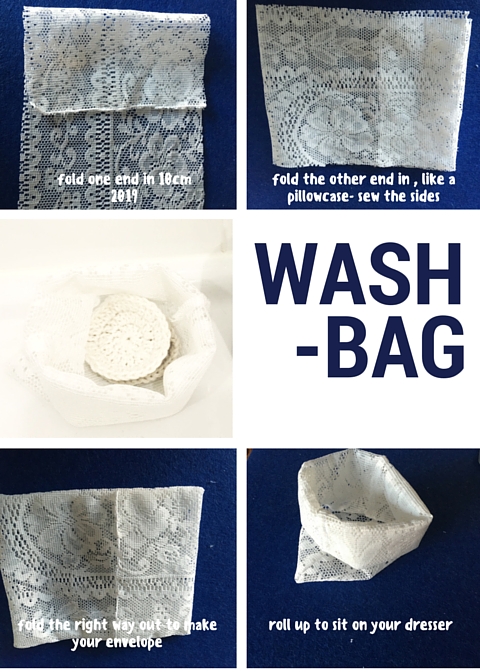
- With the wrong side of the lace facing up, fold the fabric so that it resembles a pillowcase as outlined below:
- Fold the left side in around 9cm
- Fold the right side over till the edge is level with the folded edge of the first fold, this should now look like pillow case around 20cm long.
- Pin the sides flat.
- Using your sewing machine, straight stitch closed the sides
- Zig zag stitch the raw edges of the sides to prevent fraying.
- Ttrim the thread.
- Turn the whole thing inside out – it should look a bit like an envelope with the flap on the outside. This flap helps to hold the contents in when washing.
- To keep it as an open pouch, turn the flap outside and roll down the sides.
You can of course make the pouch any size that you like!