Nut-Free, Dairy-Free Muesli Bars
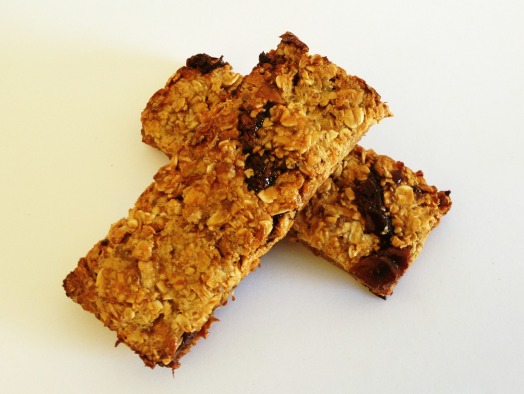
Nut-Free, Dairy-Free Muesli Bars
Our children now have more allergies than ever before, making it a tough job for parents to fill those lunchboxes.
I whipped these up to provide an easy, healthy spin on muesli bars that are kindy and school friendly. They’re pretty yummy, too!
Ingredients:
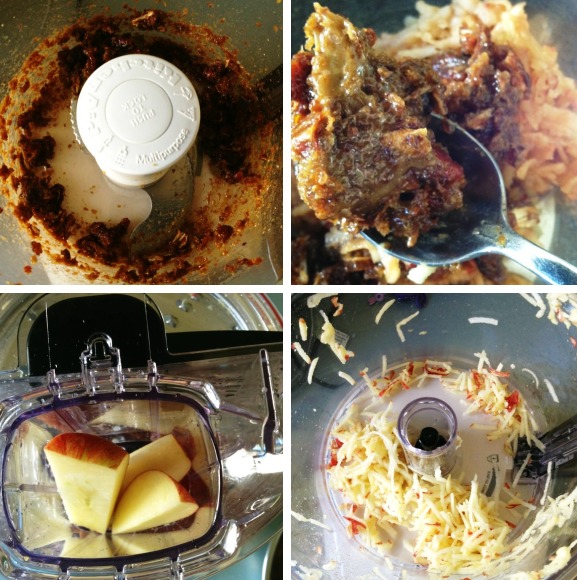
1 large apple
1 fresh orange (juice only)
1 1/2 cups quick oats
1/4 cup wholemeal plain flour
1/4 cup dried (pitted) dates
1/4 cup raisins or sultanas
2 tbsp chia seeds
2 tbsp agave syrup (you can get this at health food shops. It is a natural sugar alternative that is a cross between honey and golden syrup.)
Method:
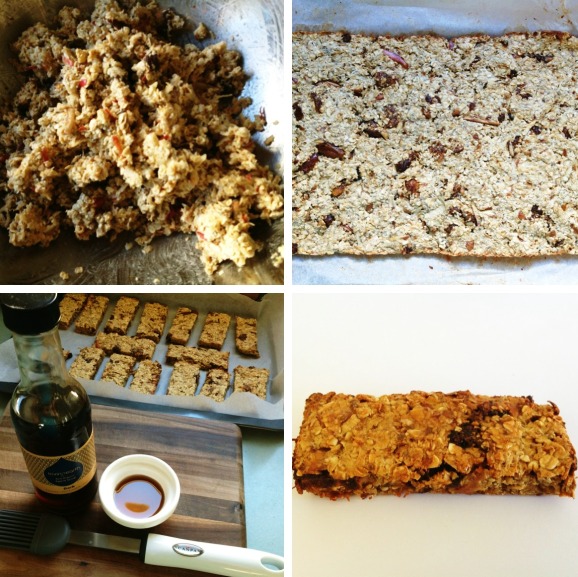
1. Preheat the oven to 180 C and line a lamington tin with baking paper.
2. Juice the orange and set it aside.
3. Cut your apple into chunks and shred in the processor, or with a grater. Transfer to a large mixing bowl.
4. Place the dates and raisins into the processor until they are the consistency you want. I like to make mine quite thin, almost paste-like because my daughter doesn’t like big chunks of dried fruit. Transfer to the mixing bowl.
5. Add the flour, oats, chia seeds and orange juice to the fruit and combine well. I find it easier to use my hands to mix it all up.
6. Press the mixture firmly into the prepared tray and make sure it’s evenly spread.
7. Bake for 25 minutes and then remove from the oven. While hot, cut the slab into bars and place on a lined tray. Brush each bar with a little agave syrup, honey or golden syrup if you would like. Return them to the oven for about fifteen minutes or so at an increased temperature of 200 C. The syrup makes them a little sweeter, and gives the bars a lovely golden colour. Also, I find cutting them and returning them to the oven as individual pieces helps to achieve nice crispy edges.
**Totally freezer friendly. Freeze them individually and pop one straight into the lunchbox in the morning – it will thaw by lunchtime. Or, if you want to eat them as breakfast bars, take it out of the freezer the night before.
Author: Katie from Mumabytes
Prep Time: 10 minutes
Total Time: around one hour
Bio: Katie is a full-time mum and blogger at Mumabytes. A Melbourne girl, she never says no to chocolate, and loves to share her ramblings about all things motherhood.