My Favourite Chocolate Mud Cake Recipe
My Favourite Chocolate Mud Cake Recipe
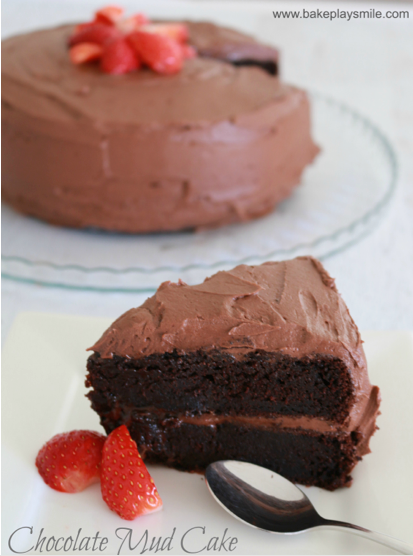
It only occurred to me the other day that I have never shared my all-time favourite chocolate mud cake recipe with you. And that’s a terrible, terrible thing because it’s really, really, REALLY delicious! And considering two of my biggest loves are cake and chocolate, I feel like I’m allowed to say that this is my favourite chocolate cake ever. It’s plain, simple and to be honest, just a really beautiful basic chocolate mud cake.
Layered Chocolate Mud Cake
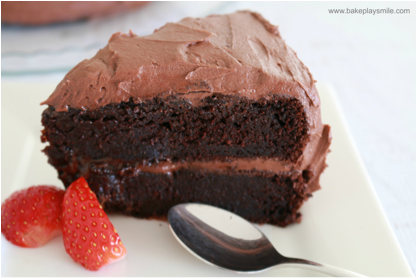
Now I must admit that I’m a huge fan of layer cakes. Why? Well, because they take less time to cook, are far more moist and they look better – yep the wow factor gets me every time. That’s three pretty good reasons, right!!?? First of all, when I make my layer cakes, I split the batter between two baking tins and reduce the cooking time. Because you’re baking two smaller cakes, rather than one massive one, it’s much quicker. You’ll also find that your cakes are far more evenly cooked too. Yep we all know that when you’re trying to cook one really big cake, the outsides will dry out and the middle takes forever to cook. Making two little cakes totally solves this problem. Secondly, by putting a layer of frosting between the two cakes, you keep that beautiful moist flavour throughout.
Mmm, the only thing better than frosting is more frosting!!! And finally, a layer cake will always be taller than a single cake. And let’s face it, there’s something really beautiful about a gorgeously tall cake. So really, given that making a layer cake is hardly any extra effort than a normal cake, there’s no wonder that they’re my favourite cakes to make! You could of course make my chocolate mud cake into one big cake, but making it into a layer cake is just so much more awesome and takes it from great to amazing!
Finally, I’ve been making this chocolate mud cake for years and every time I make it I get asked for the recipe… that’s the sign of a good cake!!!
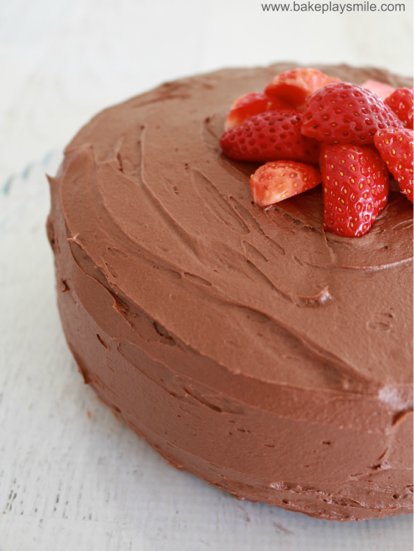
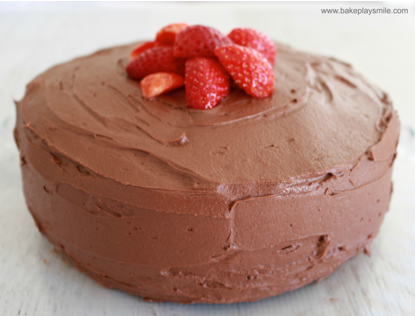
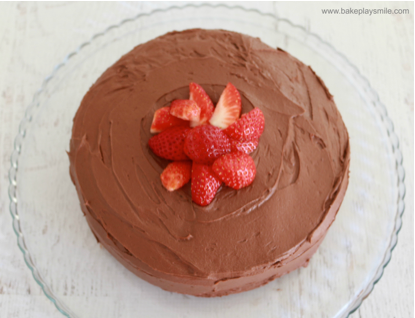
Now once you’ve frosted your chocolate mud cake, you can leave it as it (and it will taste incredible) or you can decorate it however you like. At the moment I’m on a bit of a strawberry kick so that was what I used. In the past, I’ve decorated it with crushed up Oreo’s, mini chocolate chips, Smarties, Maltesers, sprinkles. Really anything goes with this cake. It’s the perfect base for any crazy decorating fantasies you may have! And so there you have it, my all-time favourite chocolate mud cake. Chocolate cake perfection at it’s best.
My Favourite Chocolate Mud Cake Recipe
Prep: 30
Makes: 12 slices
Ingredients
- CAKE:
- 1 and 3/4 cups (220g/7.7 oz) plain flour
- 1 and 3/4 cup (350g/ 12 oz) caster sugar
- 3/4 cup (65g / 2.3 oz) unsweetened cocoa powder
- 1 teaspoon baking powder
- 2 teaspoons bi-carb soda
- 1 teaspoon salt
- 1 cup (250ml) buttermilk
- 1/2 cup (125ml) vegetable oil
- 2 large eggs, at room temperature
- 1 teaspoon vanilla essence
- 1 cup (250ml) hot strong coffee
- MILK CHOCOLATE FROSTING
- 1.25 cups (290g) unsalted butter, softened to room temperature
- 3-4 cups (360-480g) icing sugar
- 3/4 cup (65g) unsweetened cocoa powder
- 3-5 tbs (45-75ml) milk
- 1 teaspoon vanilla essence
- 1/2 tsp salt (optional)
Instructions
- Preheat oven to 180 degrees celsius (350 F)
- Grease two 9 inch round cake pans and line with baking paper.
- Sift the flour, sugar, cocoa powder, baking powder, bi-carb soda and salt into a bowl and set aside.
- Using beaters or a stand mixer, mix the buttermilk, oil, room temperature eggs and vanilla in a large bowl until well combined.
- Slowly add all of the dry ingredients to the wet ingredients with the mixer on low.
- Pour in the coffee and mix.
- Divide the batter equally been the baking pans and bake for approximately 25 minutes or until a toothpick inserted in the center comes out clean (don't overcook the cake - you want it to be nice and fudge-like!).
- Allow to cool completely.
- To make the frosting beat the butter on high speed until smooth and creamy (this will take a couple of minutes).
- Reduce the speed to low and slowly add in 3 and a half cups of icing sugar as well as the cocoa powder.
- Beat until the sugar and cocoa have been completely mixed into the butter (again this will take a couple of minutes).
- Turn the mixer up to medium speed and add in the vanilla and the cream.
- Beat on high speed for 1 minute. If your frosting isn't thick enough, feel free to add in the remaining 1/2 cup of icing sugar.
- Add a tiny bit of salt to taste (optional).
- Spread a little frosting onto a serving cake plate (this will hold the cake in place).
- Carefully place one of the cakes on top of the icing (make sure the flat side is facing up).
- Using a spatula or flat knife, spread the top of the cake with frosting.
- Place the second cake on top (this time with the rounded side up) and spread the frosting evenly into the top and the sides of the cake.
- Decorate with fresh strawberries or any preferred toppings.
- *Store in an airtight container at room temperature for 3-4 days or in the fridge for 5-6 days. Please note that keeping the cake at room temperature will result in a beautiful, moist texture.
Hope you find this recipe just as good as we have. Share it with others if you like it.
Hi there! My name is Lucy and I’m a primary school teacher, a wannabe baker, a wife, a food blogger, a pilates lover, a chocolate addict, a super-organiser and an over-analyser. When I’m not teaching, you will usually find me whipping up something very naughty in the kitchen…. chocolate and caramel are two of my best friends! Come and join me over on my blog Bake Play Smile or on Facebook for some more sugarific baking adventures!
More Cake Recipes
For more recipes like this, click here to go to other Cake Recipes in MumsLounge.com.au.


