Beginner Knitters (Age 4+): How to Make a Knitted Bunny
Beginner Knitters (Age 4+): How to Make a Knitted Bunny
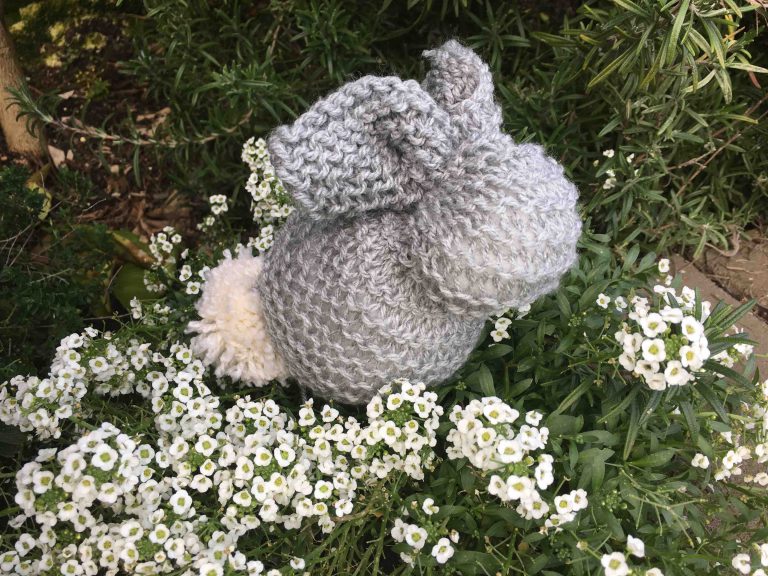
This sweet fluffy bunny is the perfect project to introduce your child to knitting as it is so basic! Once they have made a simple square, nothing will seem too hard!
You will need:
- some knitting needles
- Yarn for the body and the tail
- Needle
- Stuffing
Instructions
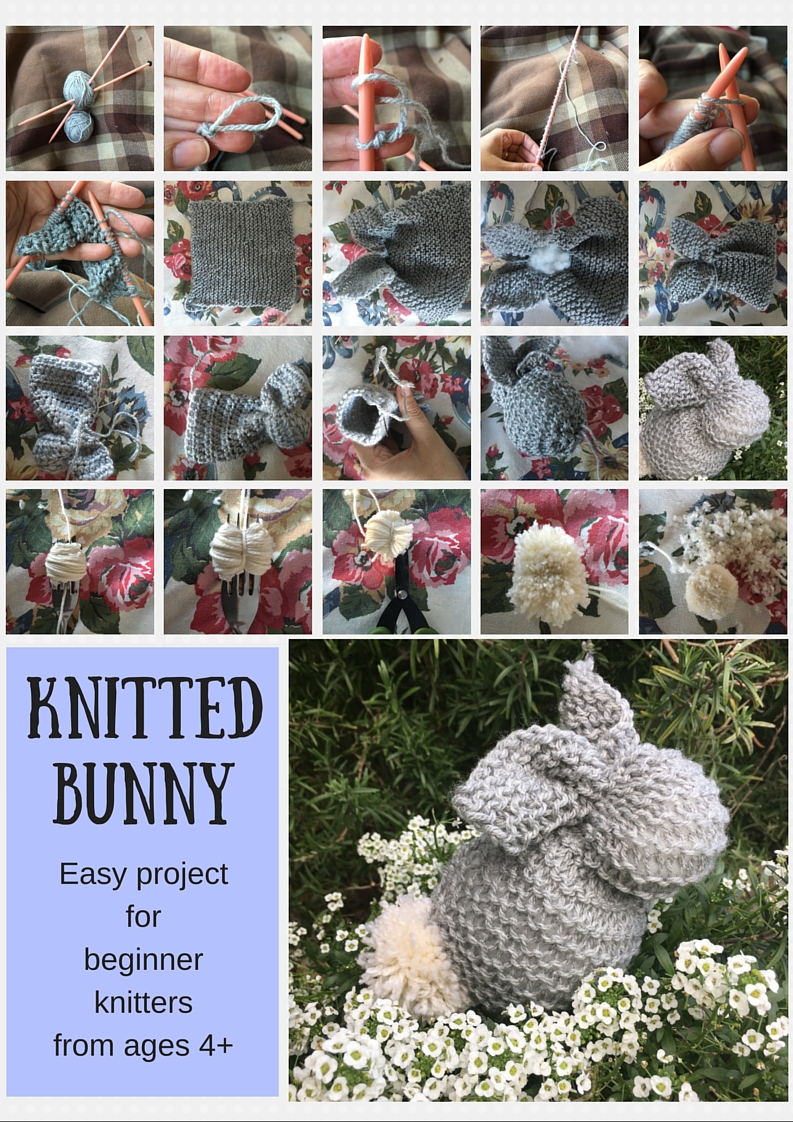
Make a slip knot, place on the needle
Cast on 30 stitches
Start by making a plain stitch and go along stitching the whole row.
(If you have to lay your knitting down and come back to it, the side where the ‘tail’ of the thread is is the side that you are knitting on to not from.)
Keep knitting rows till you have made a square, this will be depended on the thickness of your yarn and the size of your needles.
The smaller you needles the tighter or closer the gaps in the fabric you are making.
When you have reached the desired length, cast off and weave the end of your yarn in.
Using the same coloured yarn, sew along the middle of the square to divide it in half then from one corner sew up to the middle of the top of the square and them back down to the other side so that you are sewing a triangle on the top half of the square.
As you pull the thread tight it will form the ears and the pocket for the head. Stuff the little pouch that is formed with the stuffing then pull the thread tight and secure with a knot.
Sew down the back seam together to from another pouch for the body of the rabbit. Stuff.
Sew the opening shut by sewing around the circle and puling the opening tight and securing with a knot.
To make the tail.
Wrap your thread around the tines of the fork till you have a nice thick amount.
Tie the pom pom together very tightly then cut off he fork
Shape with scissors
Sew on to the bunny’s body.
Congratulations! You have made you first knitted toy!

